In this article:
This article will walk through using R1Soft to restore an incremental or a bare metal backup.
Restoring an Incremental Backup
In order to restore an R1Soft backup you’ll need to login to Take2Hosting’s R1Soft server and access your account.
- Login with your username and password here.
- If you’re having trouble logging in or you don’t know your username & password, simply open a chat with our tech support for assistance in getting access to your account. You can chat in from our homepage at here.
- Click on “Protected Machines”, find the protected machine you’d like to restore, click the drop-down “Actions” cog, and select “Open Recovery Points”.
- Find the Recovery or Retention point you’d likd to restore from, click the drop-down “Actions” cog, and select “Browse”.
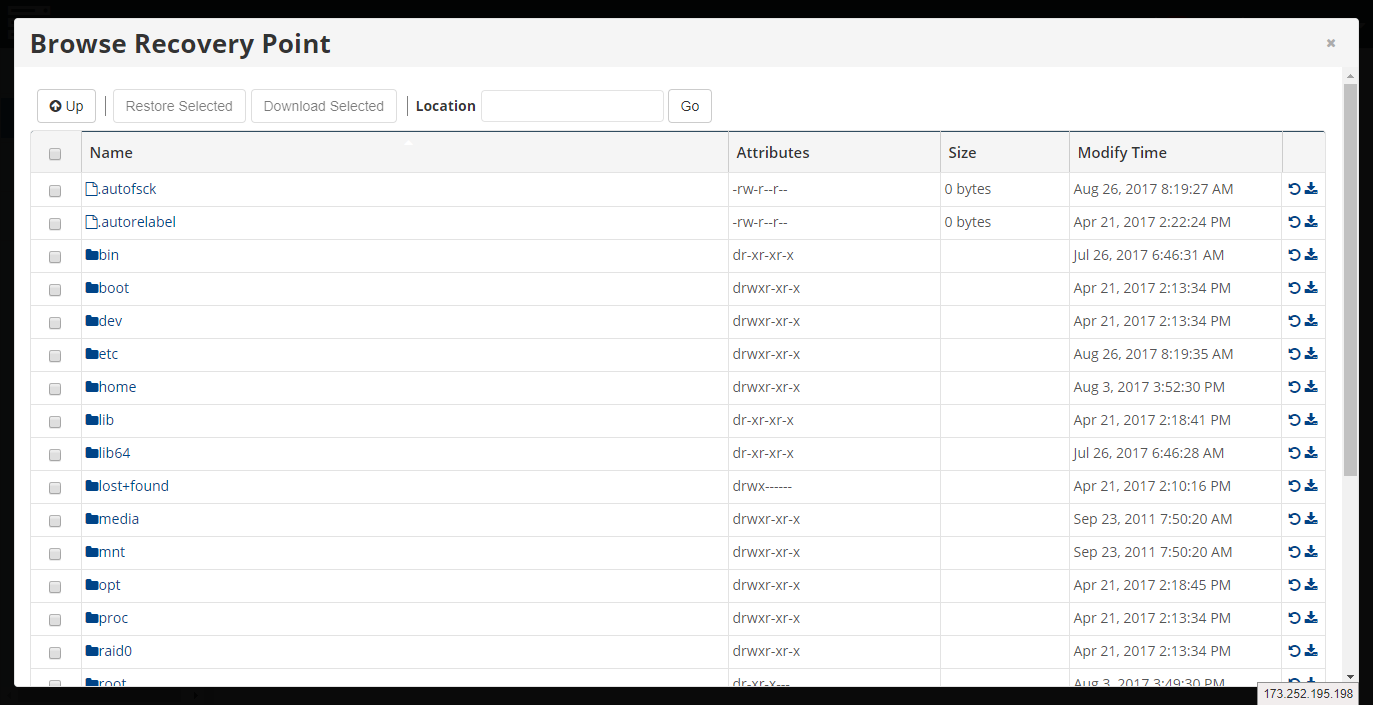
- This will bring you to a new screen titled “Browse Recovery Point”, which will have a list of files and folders copied at the time the recovery point was made. See the picture below as an example.

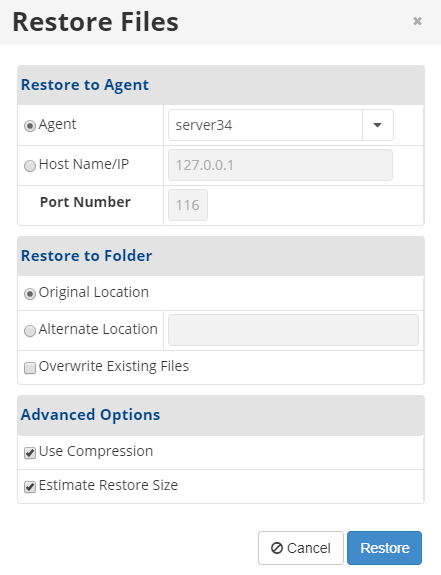
From here, you can restore an entire file path by selecting the path and clicking the “Restore” arrow, or you can double-click on a path to open up subsequent paths & files. If you want to navigate up a file path, simply click the “Up” button in the upper left corner. - Once you’ve found the folders/files you’d like to restore, click the “Restore” logo on the right. This will open up a new window entitled “Restore Files”. See the picture below.

If you’d like to restore the files to their original location on their server of origin, simply click “Restore”. You can also change the destination server or the file path by changing the options in the “Restore to Agent” and “Restore to Folder” boxes.
Restoring a Bare-Metal Backup
In order to restore a bare-metal R1Soft back up on a different server than your original, please contact our 24/7 support team in order to receive the necessary assistance to do so.